This guide explains how to perform a DIY replacement of operation keypads and membrane panels on two series of FANUC controllers from Japan: 0iA and 0iB. These components often become damaged or faulty over time, and customers can replace them on their own. This guide specifically covers models with 8.4-inch screens. Since the 10.4-inch screen models use different types of keypads, they will be explained separately.
⚠️ Important: Before performing any maintenance or repair work, be sure to turn off the machine’s main power switch to ensure personal safety.
There are four replacement items covered in this guide:
1. Replacing the Function Key Membrane Below the Screen
Use a utility knife to gently lift the edges of the membrane. Slowly peel off the old membrane by hand. Note that the membrane is attached with a very strong adhesive backing. After removal, some adhesive residue may remain on the plastic surface. You can use an adhesive remover or remove it carefully by hand. Once cleaned, align the new membrane according to the top and bottom positions, and apply it slowly from left to right.
2. Replacing the Operation Key Circuit Board
First, disconnect the two connectors on the back of the controller (gray and blue arrows in Figure 1). Then, remove the 9 screws (yellow arrows in Figure 1) to detach the entire circuit board. Place the new circuit board in position, and loosely fasten all screws first to check for misalignment. Once properly aligned, tighten all screws. Finally, reconnect the two connectors.
3. Replacing the Function Key Circuit Board Below the Screen
First, unplug the blue connector from the back of the controller (see Figure 1). Next, remove the 6 black screws from the front panel frame (yellow arrows in Figure 2). The plastic frame can now be removed and placed on a clean surface. Then, unscrew the 2 screws on the function key circuit board (yellow arrows in Figure 3) to replace it with a new one.
4. Replacing the Operation Key Membrane on the Right Side of the Screen
This process is similar to item 3. First, remove the front plastic frame. Use a utility knife to gently lift the edges of the membrane. Peel off the old membrane slowly by hand. After removal, some adhesive may remain on the metal surface—use an adhesive remover or carefully remove it by hand. Align the two positioning holes on the new membrane, and apply it slowly from top to bottom.
All four of the replacement parts described above are available for purchase from our service department. While the instructions may seem simple, if you are not confident in performing the replacement yourself, we recommend requesting professional repair service to ensure proper diagnosis and installation.
Figure 1: Operation Key Circuit Board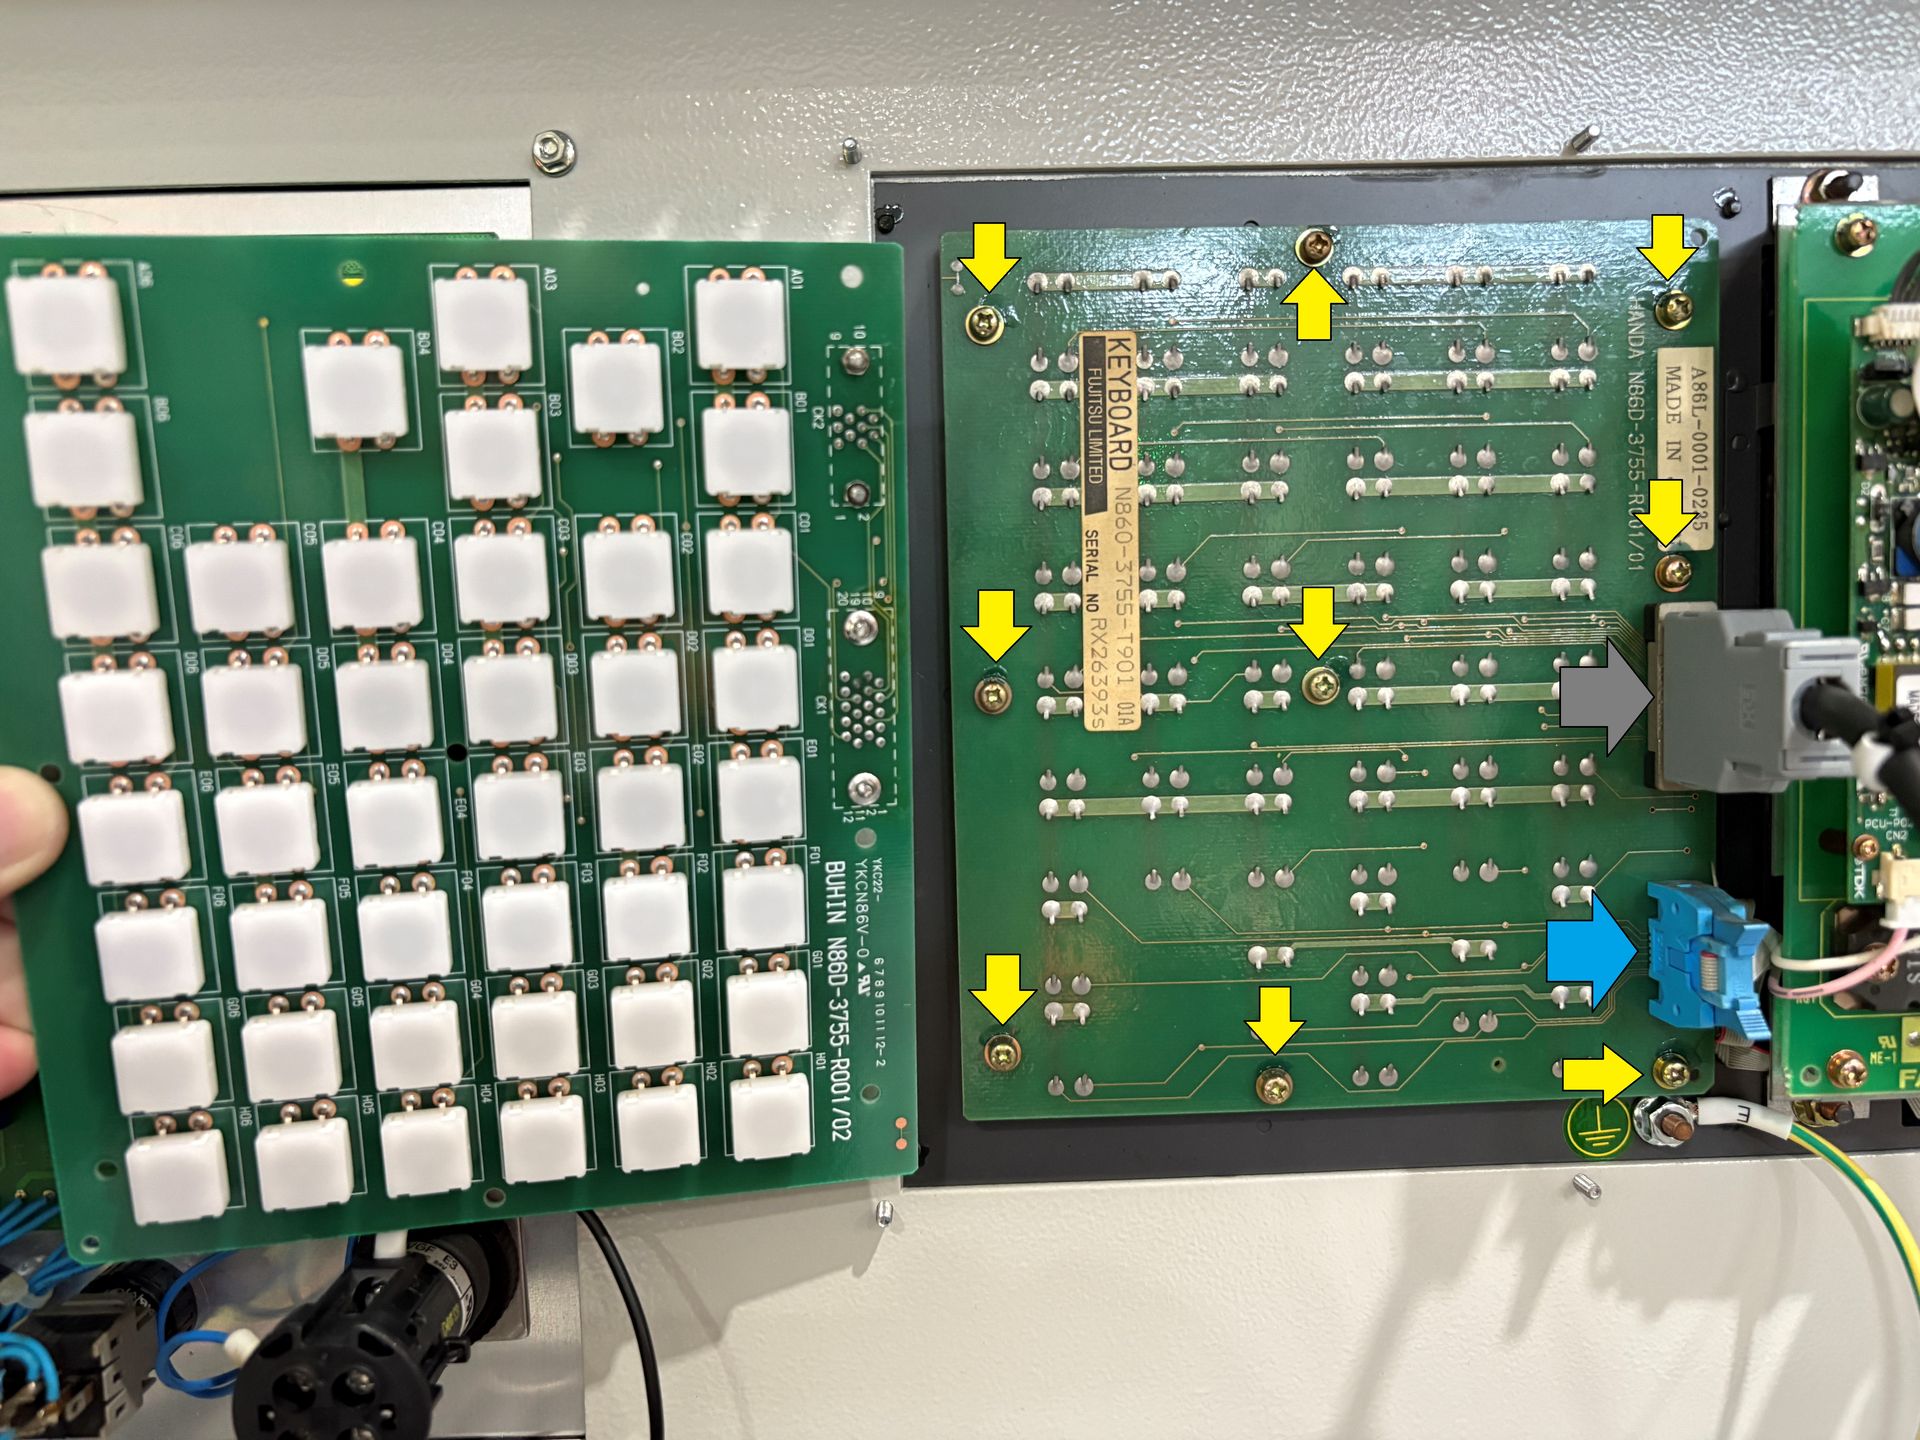
Figure 2: Front Panel Frame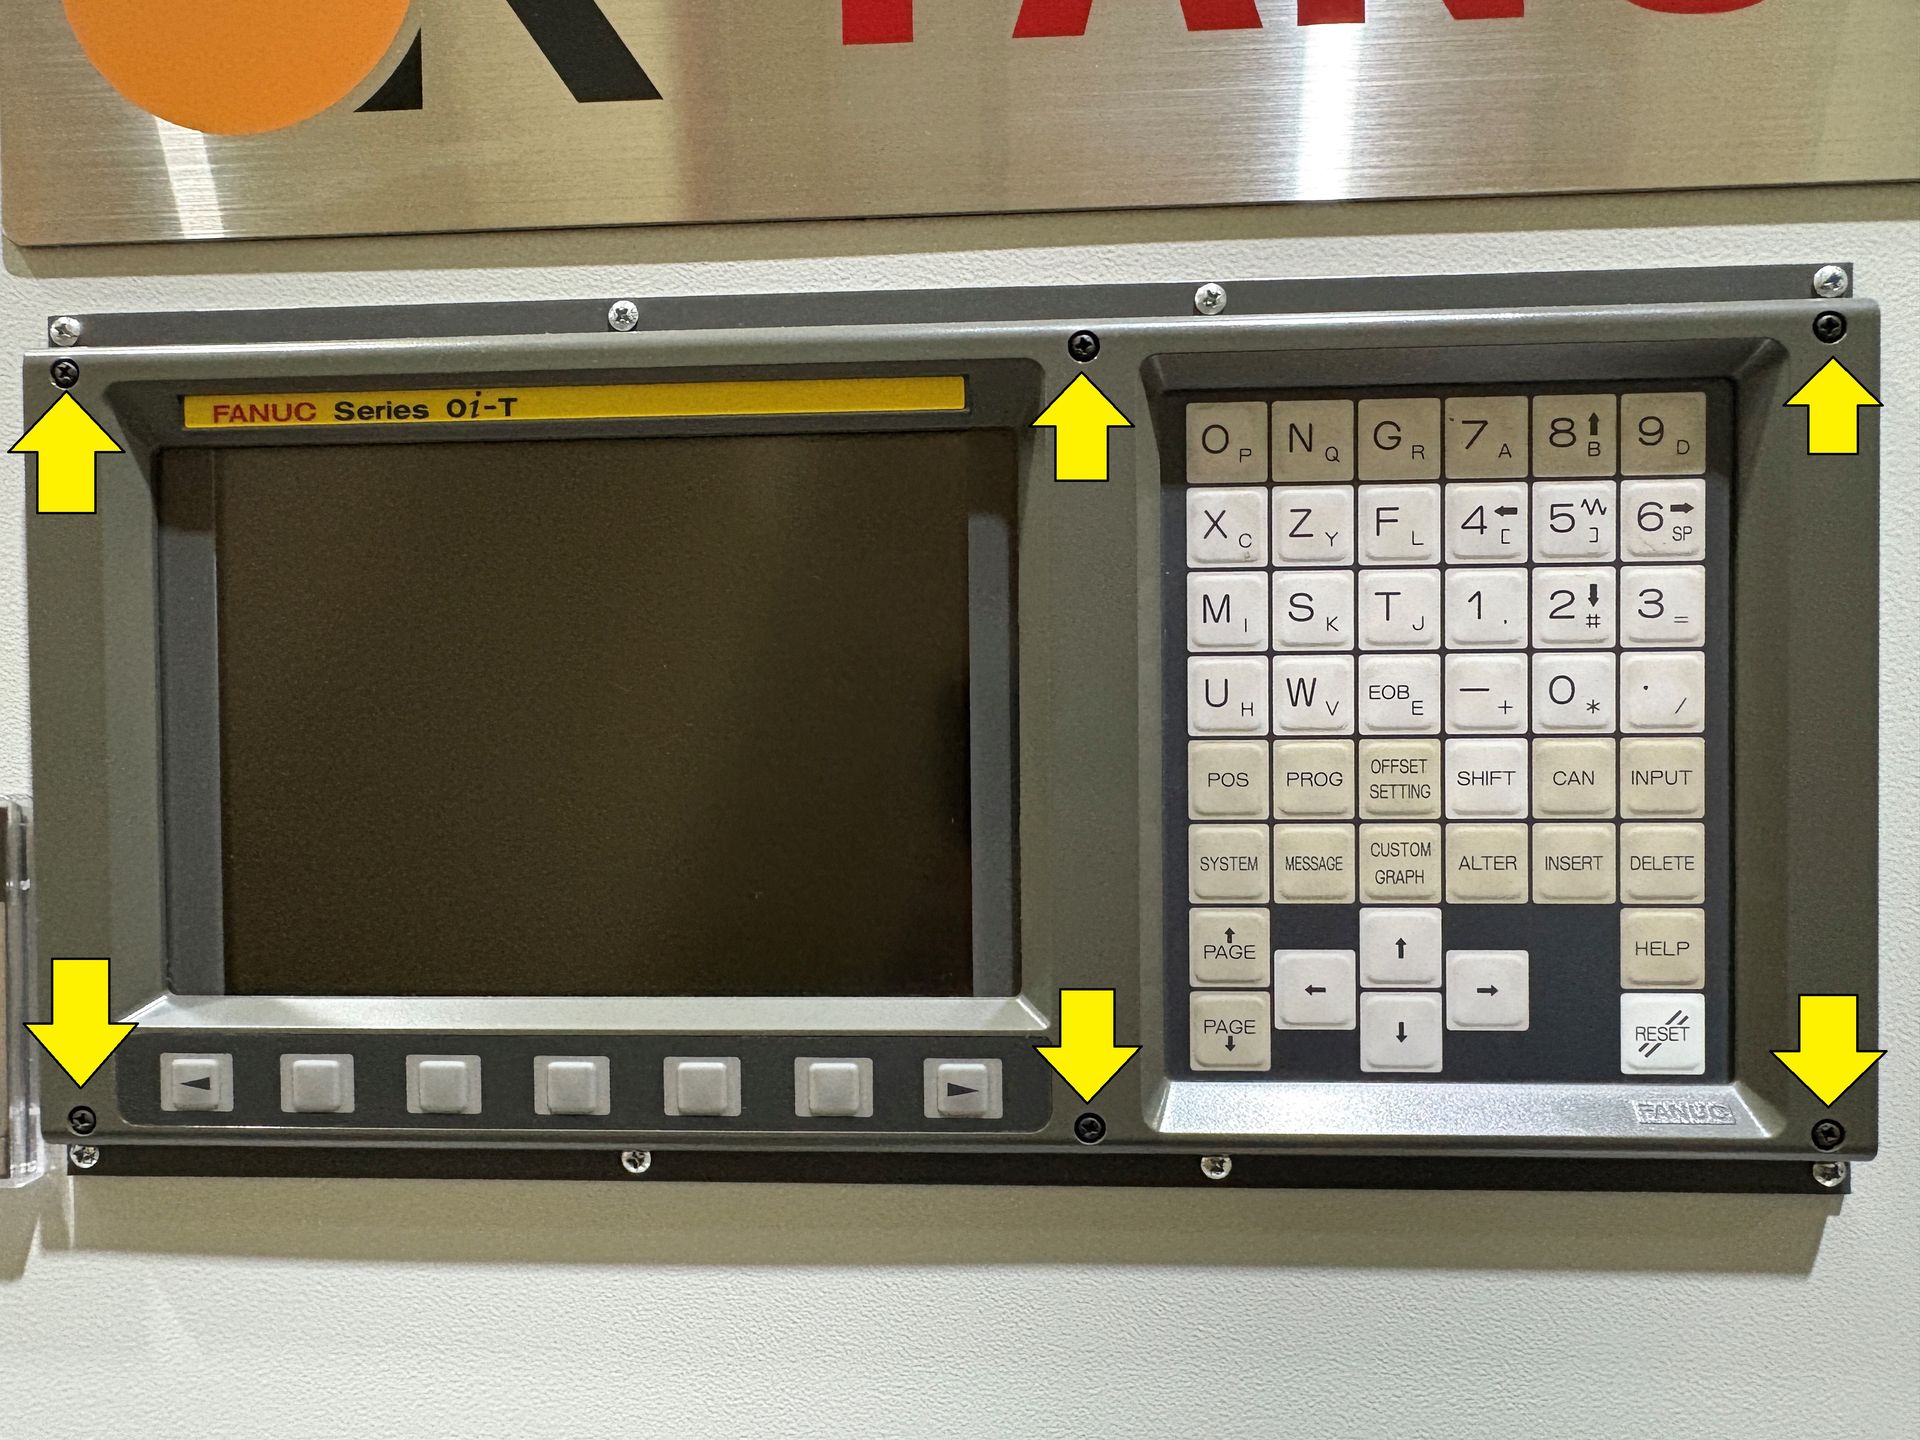
Figure 3: Function Key Circuit Board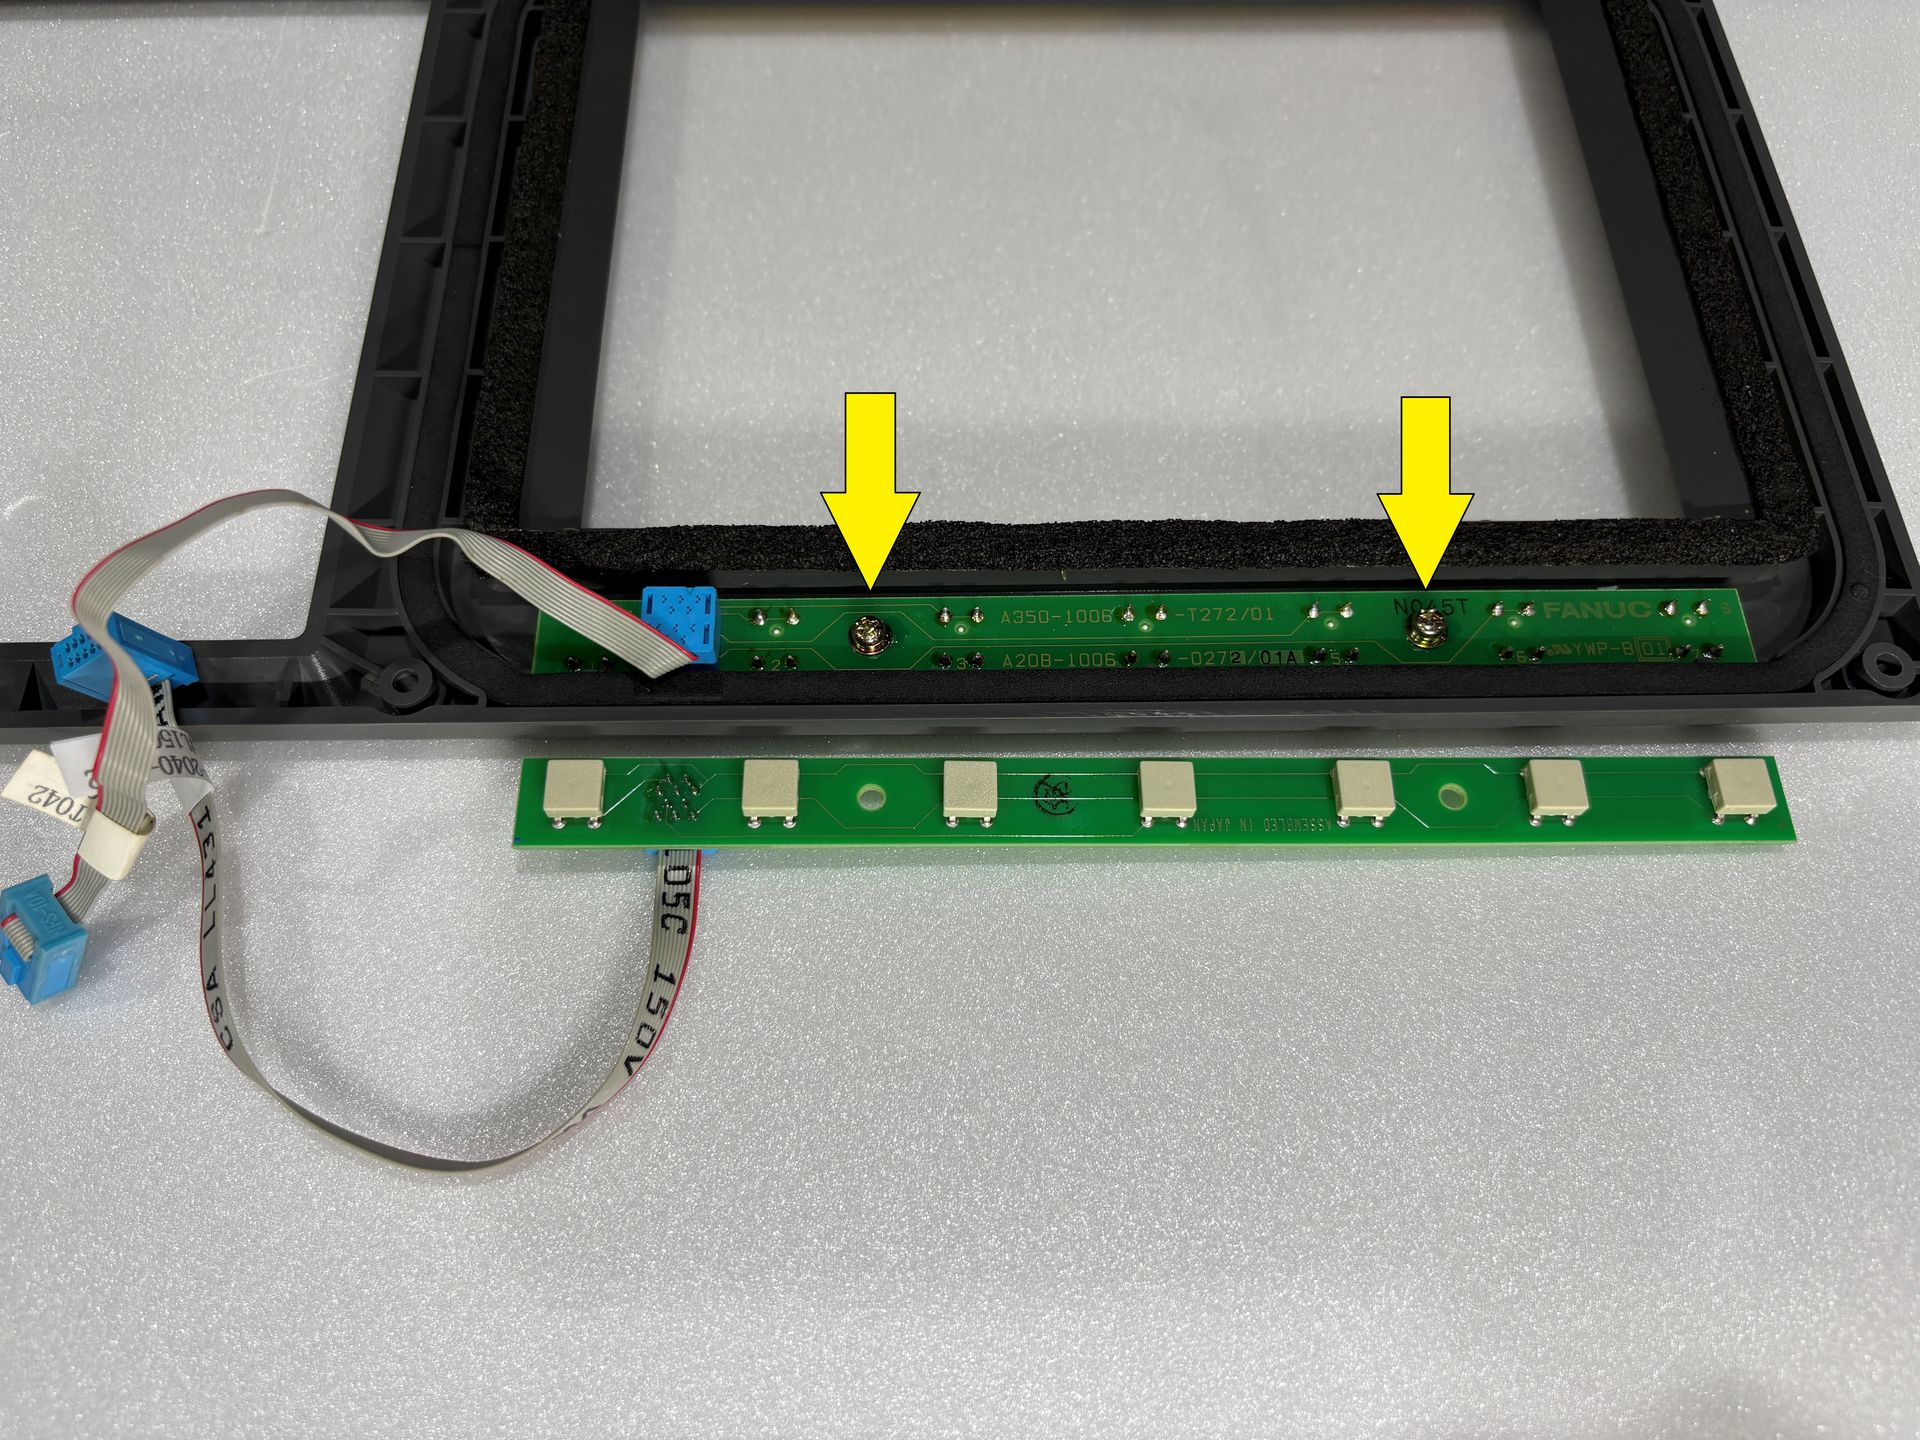
DIY Replacement of FANUC 0iA and 0iB Controller Keypad
2025/04/23